Are you tired of your volleyball games being interrupted by a torn net? Don’t worry, we’ve got you covered! In this article, we will guide you on how to replace a torn volleyball net effortlessly. Whether you’re a professional player or just enjoy a casual game with friends, a sturdy and intact net is essential for a smooth and exciting match. Say goodbye to frustrating delays and hello to uninterrupted volleyball fun with our easy-to-follow tips and tricks. Get ready to elevate your game to new heights!
How can a ripped mesh be fixed?
Yes, ripped mesh can be fixed with the right techniques and tools. Whether it’s a tear in your favorite pair of jeans or a hole in your screen door, repairing ripped mesh is easier than you might think. With a needle and thread or a patching kit, you can mend the tear and restore the integrity of the mesh. Don’t let a rip ruin your day – take action and fix it!
Don’t toss out your torn mesh just yet – there’s hope for a quick and easy fix! With a few simple steps, you can restore your ripped mesh to its former glory. Whether it’s a torn window screen or a damaged athletic jersey, repairing the tear is a breeze. Grab a needle and thread or a mesh repair kit, and get to work. Don’t let a small rip turn into a big problem – take charge and fix your mesh today!
Can nylon that has been ripped be fixed?
Yes, ripped nylon can be repaired with relative ease using a few simple steps. Start by cleaning the damaged area thoroughly to remove any dirt or debris. Next, apply a small amount of fabric adhesive along the edges of the rip, ensuring that it is evenly spread. Press the edges together firmly and hold them in place for a few minutes to allow the adhesive to bond. For added strength and durability, consider reinforcing the repair with a small patch of nylon fabric on the inside. Once the adhesive has fully dried, your nylon item will be good as new, saving you the cost of replacing it.
How can a nylon net be repaired?
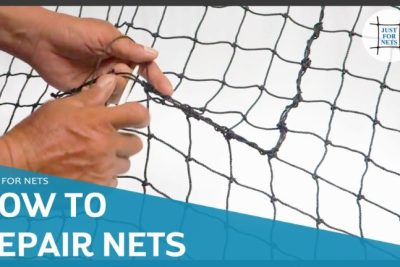
Are you tired of dealing with a torn nylon net? Don’t worry, we have the perfect solution for you! With our simple and effective method, you’ll have your net fixed in no time. First, gather a needle and thread that matches the color of your net. Then, carefully sew along the tear, making sure to create small, neat stitches. Once you reach the end, double knot the thread to secure it in place. Voila! Your nylon net is now as good as new, ready to be used again for all your favorite activities.
Say goodbye to your worries about a damaged nylon net, as we bring you an easy fix that will save the day! Begin by inspecting the tear and identifying its size. Next, cut a small patch from a spare piece of nylon fabric that matches the net. Apply a thin layer of fabric glue around the edges of the tear and carefully place the patch over it, pressing firmly to ensure proper adhesion. Allow the glue to dry completely before testing your net. Congratulations! You’ve successfully repaired your nylon net, and it’s now stronger than ever, ready to withstand all the fun and excitement that awaits.
Serve up Success: Master the Art of Replacing a Torn Volleyball Net
Serve up Success: Master the Art of Replacing a Torn Volleyball Net
1. A torn volleyball net can be a major setback during a game, but with the right skills and equipment, you can quickly get back in the game. Start by removing the old net carefully, making sure to untie any knots and detach it from the poles. Next, measure the dimensions of your new net and attach it securely to the poles. Finally, give it a test run to ensure a taut and properly aligned net. By mastering the art of replacing a torn volleyball net, you can serve up success and keep the game going smoothly.
2. When it comes to replacing a torn volleyball net, preparation is key. Before beginning the replacement process, gather all the necessary tools and materials, such as a measuring tape, scissors, zip ties, and a new net. Clear the area around the poles to make the task easier and safer. Once you have everything ready, carefully remove the old net, taking note of any damaged parts that may need repair. With proper preparation, you can ensure a seamless and efficient replacement that will have you back on the court in no time.
3. Attention to detail is crucial when replacing a torn volleyball net. Take the time to align the new net properly, ensuring it is straight and at the right height. Avoid any sagging or loose areas by tightening the net securely to the poles using zip ties or rope. Additionally, regularly inspect the net for any signs of wear and tear, and promptly replace it when necessary. By paying close attention to the details and maintaining a well-kept net, you can elevate your volleyball game and serve up success with every serve and spike.
Ace Your Game: Effortlessly Replace a Torn Volleyball Net in 3 Simple Steps
Ace Your Game: Effortlessly Replace a Torn Volleyball Net in 3 Simple Steps
Are you tired of playing your favorite sport with a torn volleyball net? Don’t let a damaged net ruin your game! With just three simple steps, you can effortlessly replace it and get back to enjoying uninterrupted volleyball matches. First, remove the old net by carefully detaching it from the poles and ensuring all knots are undone. Next, stretch the new net across the poles, making sure it is taut and evenly distributed. Finally, secure the net by tying it securely to the poles, ensuring it is at the correct height and tension. By following these three easy steps, you can quickly and efficiently replace a torn volleyball net, allowing you to ace your game without any hindrances.
Game-Changing Tactics: Quick and Easy Guide to Replacing a Torn Volleyball Net
Game-Changing Tactics: Quick and Easy Guide to Replacing a Torn Volleyball Net
Say goodbye to a torn volleyball net with these game-changing tactics that will have you back on the court in no time. Don’t let a damaged net ruin your game – follow these quick and easy steps to get your volleyball net replaced hassle-free. Start by removing the old net carefully, making sure not to damage the poles or surrounding equipment. Once removed, measure the length and width of the net to ensure you purchase the correct replacement. Next, secure the new net tightly, ensuring it is evenly tensioned across the court. Finally, give it a test run to ensure it is properly installed and ready for action. With these straightforward tactics, you’ll be able to replace your torn volleyball net effortlessly, allowing you to focus on the game and elevate your performance.
In the quest for a seamless volleyball game, a torn net can be a major setback. However, with the right tools and a bit of patience, replacing a torn volleyball net can be a straightforward task. By following these simple steps, you can restore your court to its full potential, ensuring countless hours of enjoyable play. Embrace the opportunity to elevate your game by swiftly addressing any net damage, and get ready to serve up some serious fun.